Saturday, 12 September 2009

The Garage


I was reminded about putting some facility in for an irrigation system (thankyou Gary) so after the scaffolding came down, Bob got his trusty digger down the side of the house, and made a trench to run the pipe from the house to the garage area


This is the garage from the rear - we have extended the roof out to give us a bar b q area, which was nicely put together by Rob and Clive, even down to building a nice brick base around each of the columns


Here is the front of the garage, complete with temporary door, where we now store odd bits. Also the fence posts have gone in and we are just waiting for delivery of the panels.


The fridge gets fitted


Doesnt look a lot here, but the american fridge freezer was finally craned out of the storage container and just about fits in the recess, and all plumbed in.

The house frontage


The scaffolding has gone down on our neighbours house, which is in complete contrast to our own traditional style, but I think it works in having opposite styles and provides spectators who regularly stop and look a debating point.


Its hard to think that we are planning to be in the house in a couple of weeks, but most of the work at the front is small finishing jobs. The drive and garden areas are all mapped out, and we will wait to tarmac and finish after we have moved in.


The door is on, and the paving finished off, the white semi circle is waiting for a custom designed edwardian style window pane (again an eye watering I am sure its going to be alright decision). The inside of the porch is still not finished, and that should hopefully be done this week.


The Wall!


The wall is pretty much done and the work is cracking along around the back. Here the patio area is being finished off. We did have a differnce in levels when we 'dropped' the house down 300cm, hence the small wall to handle the difference. All paving is natural sandstone so varies quite a bit on colour and composition, and we also mixed up sizes, and it works really well. It looks fairly grey here, but it is mainly a sandstone buff colour, and that should show better when it is cleaned up.


The wall and paving from the side path, this was where the conifers were, and despite the eye watering cost of replacing them, the space it has freed up is more than we thought, Just to the left bottom of the picture, there is a small patch of earth, which is where we will plant the wall climbers.


The wall from the outside, it must be the longest wall in Nantwich, and the insets you can see give it the strength, further down these are replaced by pillars


Thursday, 27 August 2009

Cinema Room


I have probably bored everyone to death over this, but the cinema room is pretty much done. It is painted in a flat matt paint that absorbs white light, so when darkened almost turns black, but in the day it looks great. The back wall is painted matt black - the middle unpainted bit is where the screen is going, and you can see the cables hanging down left and right for the speakers. Underneath are shelves for all the equipment, and lots of plugs and cables behind the screen to keep things tidy.
In the top left of the picture is the HDMI cable that runs from the back of the room to where the projector is going to be, and the white vents are the in and out for taking warm air out of the room.
Now if you would like to take your seats......
and finally the other side showing the shower cubicle, a custom designed wet area, that has worked much better than I thought. The floor is all covered so you cannot see the 'hot rocks' but know they have been filled I will get some pictures up. Fairly unique flooring, almost like small pebbles, from Barefoot Flooring, and again they really look good.


This is the main bathroom above, all tiled and done, we used a patterned grey tile for the back wall, and a white pattern for the rest. It did start out that we were only tiling one wall and shower, but somewhere along the line it went horribly wrong when the tilers pointed out to H that it would look much better all tiled. Well 4 extra deliveries later, all the bathrooms were pretty much fully tiled. We used Porcelonosa tiles, very large, and very heavy, but they look the business.


The bathrooms are coming together, this is our bathroom being finished off around all the pipes. The tiles are a black glass tile, so although they are dark, they reflect light really well. A pain to put up as they chipped easily, but they look good.


Well starting with the kitchen, most of it is now in place and it looks fab as the centerpiece of the combined back rooms. The granite in the middle is missing, as they forgot to cut a hole in it for the gas hob... still the breakfast bar to go on, and then its all wrapped up to keep it clean.

The Name...

Finally the name plaque arrived, all neatly cut out in sandstone, and no its not crooked, thats the camera angle... We had another plaque with a date on, but that got missed out somewhere along the line, so this will be good.


Moving the Fridge

Well at this point you might wonder why there were no more pictures - no it didnt get dropped, but I leant a hand to get it over the kerbstones, and into the house, where it now sits happily waiting to go into its new home. Lets hope it fits......


Well it started when H said the container is going back next week, which meant we finally had to empty it, and the biggest heaviest thing in it was the American style Fridge Freezer. We (or Clive) figured the best way to move it was by using the mini digger. Well it was a tense moment but out it came....

The Garage

and it starts to look like a garage! Considering the house was first designed with the garage integral, where the dining room was, it actually looks good seperated out, despite having to sell our souls to cover the extra cost (and dont mention the sliding gate and electric garage door)


Now the frame is up fairly quickly, and Rob is making a start on the roof.


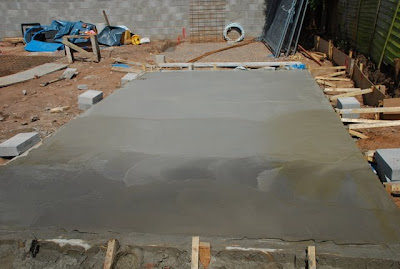
Next down goes the footings, because we have a gas main and drains somewhere down there, we have had to create a 'raft' of concrete re-inforced by lots of steel, that 'floats', (hence the name Raft I guess). Lets hope it doesnt float down the hill in all the rain!


well we have now started the groudwork in the back garden, which involves moving shedloads of dirt from the back to the front, then cutting out the patio areas, meaning even more dirt being moved. Finally the building works can start to construct the small wall, for the height difference between the house and garden.


Here it all starts in the wettest weather of the week, you can see the areas dug out for the stairs and patio


Friday, 7 August 2009

Oops a little problem

We had all the wall figured and suddenly hit a problem - the wall was not supporting the trees that were already in place, and had in fact bowed the wall outwards. A bit of poking around showed that the wall would have needed replacing in the next 2-4 years anyway, as it was weakening with the build up of pressure from the drive and trees.

So its been quite a big job - and foundations have to be excavated down to about a foot below the wall and up to the proposed drive level - shed loads of dirt, replaced with concrete, then a block wall with re-inforced steel, again infilled with concrete.

What started out as a simple job..... I hate to think what this is going to add to the budget, but it is what it is I guess. They builders have made a great job of strengthening the drive and new wall, its just made everything that bit slower.


Monday, 20 July 2009

The Hedge


And finally Bob removed all the roots, and old bricks, leaving way for the old footings to take the new wall. Everything is much brighter and it will give us back over 1 meter of space along the side of the house.


The rest of the branches were cleared, and that just left the roots


We made the decision to replace the hedge with a wall, so down came the hedge, leaving all the stumps.


This is the hedge as we got it when we purchased the land..and a little more sparse than it looks on the picture


Sunday, 19 July 2009

Completion of the Stairs

We were really pleased with the stairs which are American White Oak, going up three floors, with a gallery on the first floor. Here are some of the posts being prepared for fitting. The large double post is for the very top of the stairs,

We went for Pine risers as everything is going to be carpeted, with oak surrounds on the outside, here is part of the downstairs staircase.


Assembly starts downstairs first, and allowance is made for the flooring height, and then the components are fitted together


Within a day its starting to look more like a staircase, and Paul and Jason are doing a great job pulling it all together.


This is then the first floor, and in the background we still have the trusty ladder access to the top floor area.


..And finally its starts to look like a staircase, the time consuming job of putting in the spindles has started


And this is probably the best picture to show the gallery style landing on the first floor. We decided to maximise the hallway space within the design, so as much light as possible comes through the house.


Thursday, 9 July 2009

Flooring (Continued)

The material is applied using a trowel, and gently spread across the flooring, with one person wearing spikes (the furthest) and another rolling the liquid to ensure it spreads evenly.
The mix of flakes that we have chosen is then thrown over the screed, fairly evenly, and then sticks to the top of the liquid


Close up this is what you get - the mix we had is a combination of creams, black and gold to reflect the kitchen units and decor.


and the final (well almost) finish looks really great - the next step is to then apply final clear layers to build up the finish. We have opted for a slight matt finish, but you can get an extra layer that can be polished as well.


Very happy with that - and now they start on the bathrooms using another new concept 'Hot Rocks'

Flooring (Continued)

Flooring (Continued)


So out came all the powder and materials to make up the mix - here the lads are getting ready to mix up the 'potion'


Barefoot Flooring

Well finally comes the finish we have been waiting for - the Barefoot Flooring Cocktail Mix. This is a new flooring finish that you can pretty much specify any finish, and any combination of colours, and it is poured on like a screed, then it dries to a matt or polished finish.

We had seen it in the showroom, and it looked pretty stunning, so this was the first time to see it in action.

So first of all they set out the floor, by putting down a sort of rubber screed that sealed the floor.


Then this was cleaned and any bumps and grit taken out, so we had a very smooth finish